LEMOSHO ROUTE
LEMOSHO ROUTE
Climbing Mount Kilimanjaro via the Lemosho Route offers a relatively newer option, one that gained rapid popularity after its establishment.
In essence, not all parts of Lemosho are novel. It represents a variant of the Shira route. Many trekking agencies even refer to Lemosho as Lemosho Shira, emphasizing the traverse across the Shira Plateau.
Refer to the detailed route description provided to determine precisely which route you will undertake.
The initial two to three days of both routes differ. However, the contrast is significant!
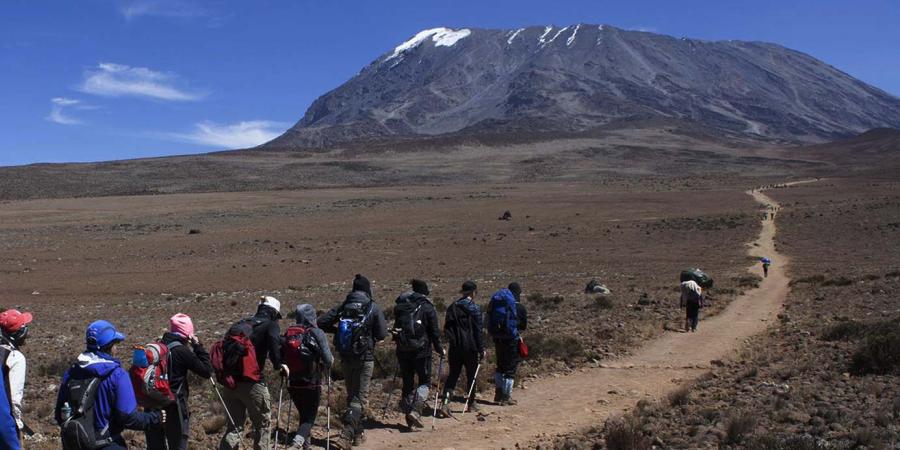
The Lemosho Route stands out as the most picturesque path on Kilimanjaro, from the outset to the conclusion.
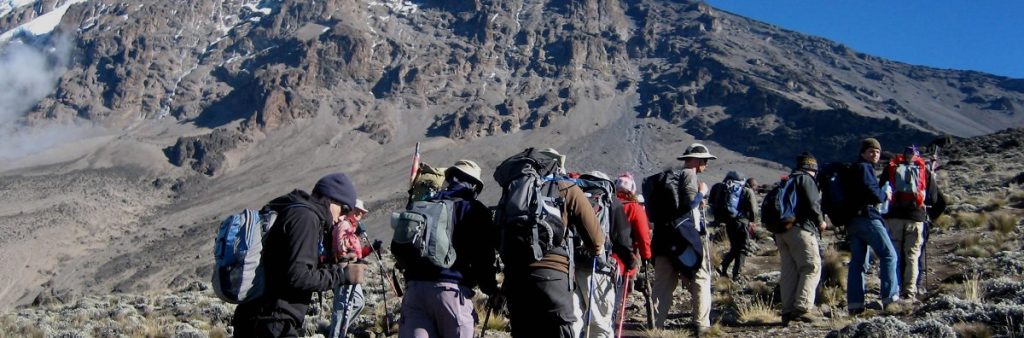
The trail commences north of Shira, situated on the western flank of the mountain. However, unlike the Shira Route, where the initial day entails traversing a broad 4 WD road, Lemosho offers a narrow wilderness path right from the outset, meandering through pristine and secluded rainforest areas with ample opportunities for wildlife sightings.
Subsequently, it traverses the Shira Plateau before intersecting with the Machame Route near the Lava Tower.
Fortunately, despite its increasing popularity (particularly among repeat Kilimanjaro climbers), Lemosho attracts a significantly lower number of trekkers. This discrepancy is relative, with a substantial gap remaining between the Marangu and Machame Routes, which are notably crowded, and all other routes.
The reason for the perpetually lower numbers on Lemosho compared to Marangu or Machame is evident: it’s not the most economical option.
Commencing the ascent from the western side necessitates additional transportation costs. Opting for a longer trail entails additional expenses for extra days on the mountain. Furthermore, climbing a less frequented route leads to higher prices due to reduced competition from budget tour operators.
Moreover, Lemosho presents a relatively challenging route, owing to both the terrain’s characteristics and the trail’s duration.
On the bright side, Lemosho offers superior opportunities for acclimatization to altitude, thereby enhancing summit prospects. Additionally, climbing this route with a reputable Kilimanjaro tour operator significantly boosts success rates.
Furthermore, if your itinerary has been strategically planned to avoid the peak traffic periods on the Machame trail (a practice adopted by some operators), you can expect a splendid ascent along the most picturesque route, free from the crowds that often plague the popular trails.
Below are further detailed insights into what to anticipate during a Kilimanjaro expedition via the Lemosho Route.
Lemosho Route Itinerary
There are various possible iterations of the Kilimanjaro Lemosho route, so it’s normal to encounter itineraries featuring different camps and altitudes.
Outlined below is a seven-night/eight-day Kilimanjaro ascent via the Lemosho Route.
Similar to the Machame trek, this journey can be shortened by skipping the overnight stay in the Karanga Valley and proceeding directly from the Barranco Huts to the Barafu Huts in a single day.
Additionally, some operators opt to omit the second night at Shira One, transforming it into a VERY demanding six-day trek.
For those seeking additional acclimatization, the trek can be extended by adding an extra night at Moir Huts.
Experienced mountaineers may also consider the challenging and perilous specialist version via the Western Breach.
(Note: Altitudes and distances are approximations and may vary depending on the source.)
Starting Point: Londorossi Gate (2100 m/6900 ft)
Duration: 7-8 days
Day 1 – Londorosi Gate/Lemosho trail head – Big Tree Camp (Mti Mkubwa) (2650 m/8695 ft) Distance: 6 km/3.7 miles Duration: 2-3 hours Altitude gain: 550 m/1795 ft
Day 2 – Big Tree Camp – Shira I (3480 m/11420 ft) Distance: 8 km/5 miles Duration: 4-5 hours Altitude gain: 830 m/2725 ft
Day 3 – Shira I – Shira Huts (3850 m/12630 ft) via Shira Cathedral Distance: 11 km/6.8 miles Duration: 6-8 hours Altitude gain: 370 m/1210 ft
Day 4 – Shira Huts – via Lava Tower (4640 m/15220 ft) – Barranco Huts (3985 m/13070 ft) Distance: 9 km/5.6 miles Duration: 6-8 hours Altitude gain: 135 m/440 ft (790 m/2590 ft to Lava Tower)
Day 5 – Barranco Huts – Karanga Camp (4040 m/13255 ft) Distance: 5.5 km/3.5 miles Duration: 4-5 hours Altitude gain: 55 m/185 ft
Day 6 – Karanga Camp – Barafu Huts (4680 m/15360 ft) Distance: 3.5 km/ 2.2 miles Duration: 4-5 hours Altitude gain: 640 m/2105 ft
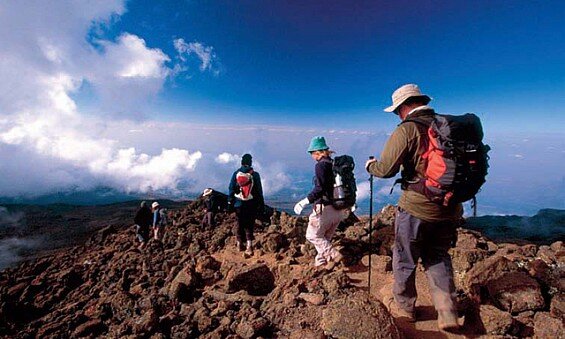
Day 7 – Summit attempt via Stella Point (5752 m/18871 ft) to Uhuru Peak (5895 m/19340 ft) and descent to Millenium Camp (3820 m/12530 ft) (or to Mweka Hut) Distance: 5 km/3 miles ascent + 10 km/6.2 miles descent Duration: 5-6 hrs + 1-2 hours up, 5-6 hours down (overall walking time may vary from 10 – 16 hours) Altitude gain: 1072 m/ 3511 ft (Stella Point) or 1215 m/3980 ft (Uhuru Peak) Descent: 2075 m/6810 ft
Day 8 – Millenium Camp – Lemosho Gate Distance: 20 km/12.5 miles Duration: 5 hours Descent: 1990 m/6530 ft
Climbing Mt. Kilimanjaro – Lemosho Route – Day 1
Commencing the Lemosho Route starts at the Londorossi Gate, requiring a two to three-hour drive to reach. On this inaugural day, you may find yourself spending more time in transit and awaiting procedures at the gate than actually trekking.
Londorossi, encompassing both the village and the park gate, resembles a scene from a Western movie, with its entirely wooden construction. Enclosed by high timber fences, it serves to deter wildlife intrusion, highlighting the advantage of selecting this less frequented route. Indeed, opportunities for wildlife sightings are enhanced during the initial days.
You might encounter wildlife right from the start; a troop of striking black and white Colobus monkeys has taken residence near the ranger quarters. Take a moment to observe them while administrative formalities, such as registration and permit acquisition, are sorted—an integral part of commencing a Kilimanjaro climb.
Following gate registration, you backtrack the same route for about ten minutes, traversing fields and cypress plantations to reach the trailhead, alternately referred to as Londorossi, Lemosho Glades, or Simba.
Another gate awaits, accompanied by an additional fee to the forest authority for road maintenance. Continuing along the muddy road for another 20 minutes eventually leads you to the true trailhead.
Your journey kicks off in dense, misty rainforest, reminiscent of a fairy tale setting. Abounding with smaller wildlife, notably colobus and blue monkeys, this area once necessitated ranger accompaniment due to the presence of water buffaloes in the early days of the route’s establishment. However, sightings of larger animals are now rare due to the increased number of climbers.
The initial day on the Lemosho Route encompasses several steep sections to invigorate the senses, culminating in a two to three-hour trek to the inaugural campsite, the Big Tree Camp or Mti Mkubwa (Forest Camp, though rarely referred to as such). Nestled beneath a towering tree, this picturesque camp teems with monkeys and birds, their presence often audible during the serene evenings and mornings.
Climbing Mt. Kilimanjaro – Lemosho Route – Day 2
The second day’s trek may span “only” four to five hours, but it promises to be no easy feat. The trail ascends sharply today, necessitating numerous breaks along the way.
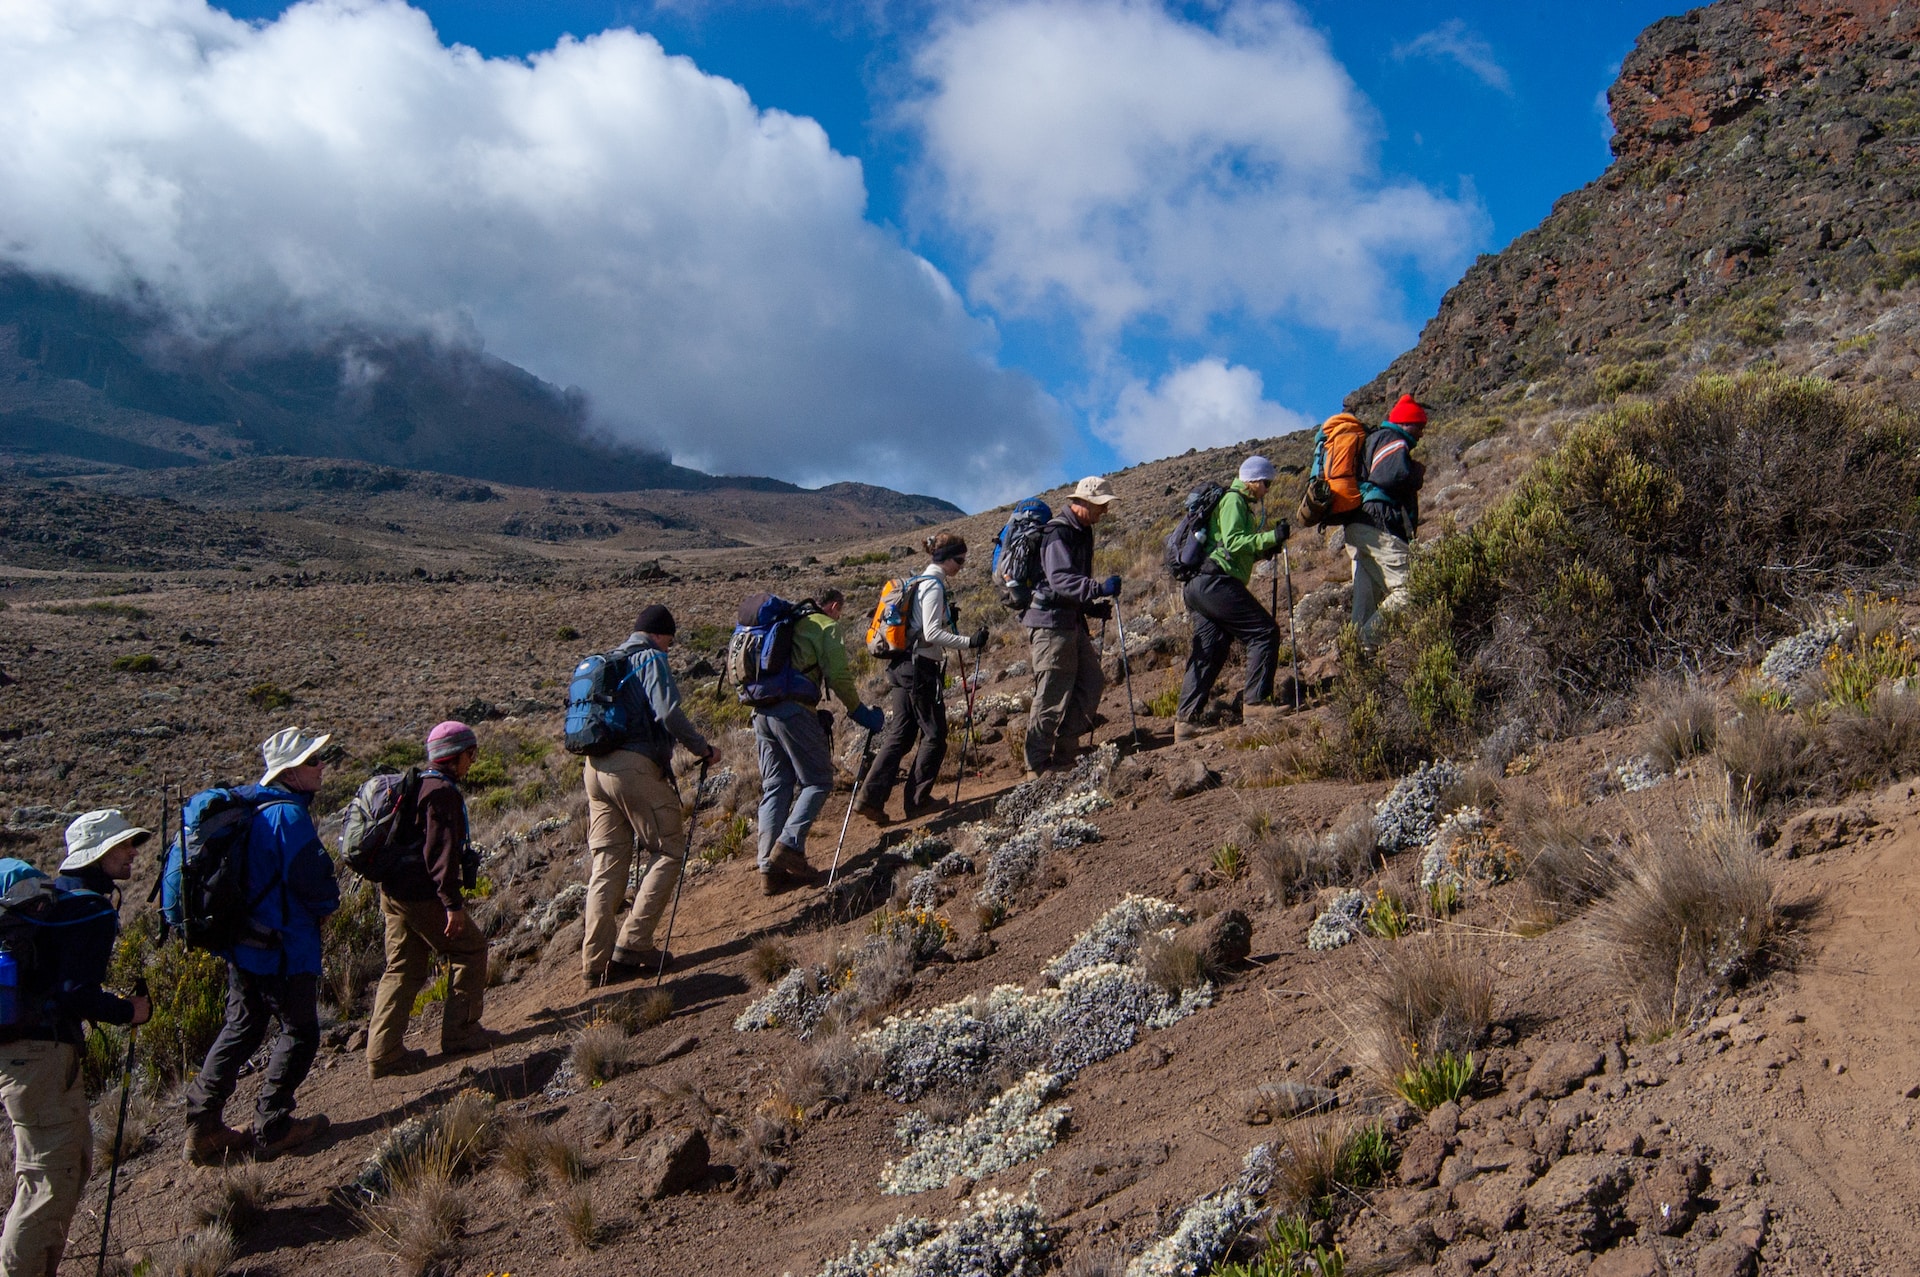
Upon reaching the first significant ridge, the dense forest gives way to moorland adorned with towering heathers as you ascend towards the expansive Shira Plateau.
Several additional steep ridges punctuate the journey, offering panoramic vistas, well-deserved respites, and descents into valleys on the other side.
Afternoon approaches, and with it, a welcome flattening of the path—though steepness persists. Before long, you find yourself perched at the edge of the Shira Plateau, standing at 3612 meters (11840 feet) above sea level. Kibo looms directly ahead, the Shira Ridge to your right, and the plateau sprawls beneath you.
Yes, beneath you. From this point onward, it’s a downhill journey. Your next camp, Shira I, lies at 3480 meters (11420 feet) altitude.
Despite the strenuous nature of the day, don’t be deterred. You’ve ample time at your disposal. Many climbers deem this leg of the trek as their favorite, owing to its challenges and rewards alike.
Climbing Mt. Kilimanjaro – Lemosho Route – Day 3
On day three, there are numerous possibilities and route variations to consider. One common option involves trekking directly across the plateau. While the path ascends steadily, it’s far less steep than the previous day’s ascent.
After approximately one to one and a half hours of walking, you’ll arrive at the junction of the Lemosho Route and the four-wheel-drive track marking the start of the Shira Route. Here lies the Simba Cave Campsite (3590 m/11780 ft) alongside the Simba River.
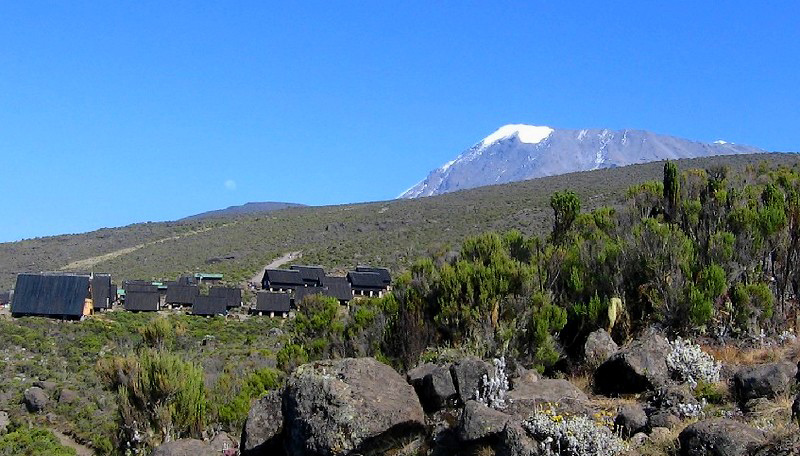
Continuing for another hour to hour and a half, you’ll likely reach your final destination for the day, the Shira Huts camps.
For those trekking with a higher-end operator, there’s a possibility to veer off halfway between the route junction and the Shira Huts, spending the night at the quieter Fischer Campsite (3885 m/12745 ft), which lies off the main trail.
Some companies may opt to use Fischer as a lunch stop only and proceed to Moir Huts (4140 m/13579 ft).
Alternatively, there’s the option to stay at Shira Huts and make the detour to Moir Huts the following day.
However, there’s a more interesting and longer alternative for day three: a detour to the southern edge of the rim and the Shira Cathedral, which includes a climb to its summit (3720 m/12200 ft).
While this route extends the day significantly, it offers a scenic and varied walk with breathtaking views throughout. Plus, don’t overlook the added benefits of acclimatization gained by ascending to the Cathedral’s peak.
Seek out an operator that includes this detour—it’s well worth the effort.
Climbing Mt. Kilimanjaro – Lemosho Route – Day 4
Assuming you camped at Shira Huts, the fourth day commences with a solid two and a half hours of walking, mostly uphill with some scrambling required for two short sections. As you follow the slope of the Lemosho Plateau, you gradually leave behind the heather and moorland, entering the mostly barren alpine desert region and enjoying breathtaking views throughout the journey.
Soon, you encounter the first junction. One option is to add an acclimatization day here and continue your trek to Moir Huts (4140 m/13579 ft), located thirty minutes off the main trail. This scenic and tranquil campsite nestled in a valley surrounded by steep slopes is possibly the quietest on the mountain. If your operator includes this stop, you’ll arrive around lunchtime and have the afternoon to explore the Lent Hills, including an acclimatization walk to 4700 m.
Alternatively, other climbers continue on the main trail. After navigating some bends and ups and downs, you reach the junction with the bustling Machame Route. Shortly afterward, you encounter another junction. Here, you have the option to head towards the Lava Tower as a detour or even for an additional night, or to continue straight on towards Barranco.
(Climbers opting for the summit via the challenging and hazardous Western Breach route will veer off towards the Lava Tower Camp.)
The Lava Tower, a 100 m/300 ft volcanic plug remnant from Kilimanjaro’s volcanic past, lies ahead. The path towards it is a gradual slope, and as you ascend, even the short heather disappears, revealing the rocky ground of the lava ridges.
The ascent can be taxing, as you’ll be climbing to over 4500 m, and the body notices the lack of oxygen.
After a well-deserved lunch break near the Lava Tower, you descend into the stunning Barranco Valley, formed by a massive landslide approximately 100,000 years ago. Sheltered by towering cliffs, the valley is much greener, boasting vegetation once again, notably the giant senecios and lobelias. With great views across the plains below and your first glimpse of the Barranco Wall, which you’ll tackle tomorrow, the Barranco Camp awaits.
Undoubtedly the most spectacular campsite on this route, it offers fantastic views of Kibo, the Western Breach, and the first of the southern glaciers—a fitting reward after a strenuous day.
If you experience slight symptoms of altitude sickness, it’s normal given the altitude you’ve reached today. Climbing high and sleeping low aids in acclimatization, so don’t be discouraged by the loss of hard-earned altitude. This was a crucial day for acclimatization.
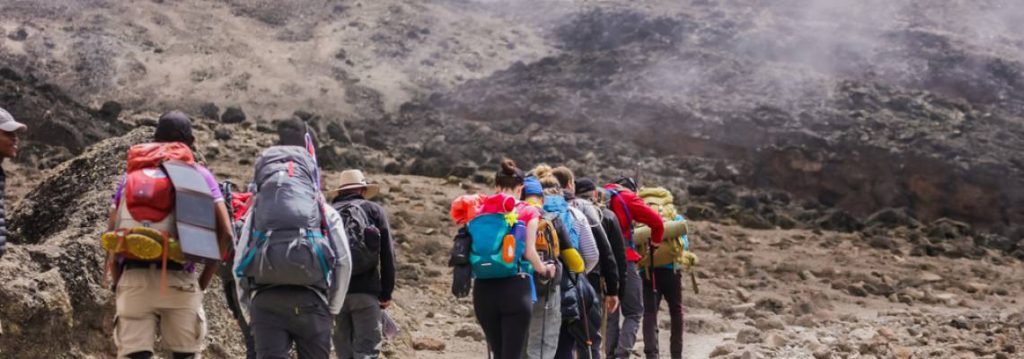
From the Barranco Camp onward, whether climbers arrived via Machame, Shira, Lemosho, or a special route around the northern circuit, all follow the same trail.
(Note: In this version of the Lemosho route, there’s an additional day, making day 4 on other routes equivalent to day 5 here.)